Thursday, November 3, 2011

Homework... To assign or not?

Homework.... 

Is it worth the effort of assigning?
Are they even going to do it?
Most of my students have bigger problems at home.
Is this going to use up all of my copies?
Great... one more thing to grade.

These were always my thoughts when it came to homework. So, my first couple of years teaching I did not assign homework. I used the ol' "Whatever you don't finish in class is homework" motto. This didn't work all that well because most students that did not finish their work in class, weren't going to take the time to do it at home. It just disappeared into the black hole of their pockets, never to be seen again. Therefore, resulting in me making additional copies for them. Yuck!

However, this year I have tried something different.... and I LOVE it! I became slightly extremely obsessed with Vistaprint this summer. In all of my creations, I created a homework punch card! I wasn't sure how I would use it, but decided I would make it work since I could get 250 for free! (If you don't know about Vistaprint, please check out my previous blog post here and look at their website here.


So, with my punchcard, I created my plan for homework. I believe that homework should be extra practice of skills that have already been taught in class. I also believe that homework should not be something that will affect a student's grade due to the fact that I have no control of their home lives and what goes on outside of school. That being said, I think that homework is important for students to be able to practice the skills they are learning and get in the studious habits that a successful student needs.

I decided to make a homework schedule so that my students' parents were aware what type of homework their child would have each night. As well as eliminating the excuse "I don't have any homework tonight." Parents know that their child DOES have homework every night except for Fridays.

Here is what my schedule looks like:

Mondays: Math Practice and Read 20 Minutes
Tuesday: Science or Social Studies Practice and Read 20 Minutes
Wednesday: Language Arts Practice and Read 20 Minutes
Thursday: Spelling List Practice and Read 20 Minutes

As far as examples of what I might assign would be a math game we have create in class, flashcards, short practice page, workbook page for science or social studies, write a few paragraph-long story, write spelling words in sentences, write spelling words with various colors, etc.

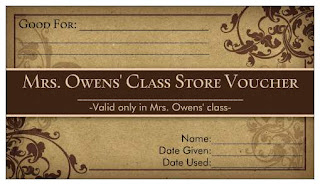
Each morning I then ask the students to get out their homework and punch cards for me. I walk around the room, check to see that they did it (sometimes I pick them up if it is something that I want to see how they did on it) and then punch their cards with a hole punch. When they fill up their cards, they get to add $5 to their class bank account that they keep to buy things in our class store.

So far, this system has worked beautifully! I don't have anything extra to grade! The majority of my students do their homework.

Sunday, October 2, 2011

Explorer Journals

Last week we started studying early American Explorers as part of our Social Studies curriculum. I thought I would share how we do this. I have seen the ideas below in a variety of places. I have then taken them and tweaked them to fit what we are covering.


My students started with a legal-sized file folder. (I cut them along the fold line so each folder made 2  journals.) They then covered them in masking tape.

After the masking tape, came shoe polish. I just bought the cheap liquid stuff at the dollar store. It dried quickly and gave the desired effect.


I then made journal pages to put inside. Those were stapled into place.


Here is what the inside cover looked like:


There you have it! A lovely journal to keep our notes about explorers. We will tie a string around them when we finish all of the pages.


The kids loved making them! Inside, they are then filling in all kids of information about some of the important explorers that they need to know. There is a spot for the explorers name, years explored, what he was looking for, what he found, where he traveled, and other facts. On the other side of the page, I put a world map so that they can draw out the route traveled. Last, but not least, (my favorite part) is the journaling section at the end. This is a spot where my students pretend that they are a person on the expedition with the explorer. They then write a letter to their family at home. It has been so cute to read what they come up. They all talk about the horrible conditions, getting sea sick, eating hardtack all the time, and the mean explorers. I think it really puts explorer-life into perspective for the students. They seem to really enjoy it! They ask every day... "Who do we get to study today?" 


Along with studying each explorer, we are reading "Pedro's Journal" by Pam Conrad as a class. It is a book about a ship-boy aboard the Santa Maria with Christopher Columbus. I think that the book has made the explorers even more relatable. I would highly recommend it! They are realizing that Columbus might not be the hero that they were taught about when they were little. It has brought up very interesting conversation with Columbus day approaching.

I hope that if you teach exploration, this might give you some new ideas! 


Also, I have linked up with Clutter-Free Classroom's Linky party! Please check out her website to see what other teachers are doing this week in their classrooms!


Saturday, September 10, 2011

Native American Dioramas

Well, school is now in full swing! My favorite subject to teach is Social Studies! I just love everything about it! I think my enthusiasm is contagious to my students as well. They get all excited about history just because I do! In 5th grade, we cover American history from the early Native Americans to the Civil War. I love to do projects with my students that will hopefully make the history stick in their brains! So here is a project that is one of my favs...

We have just started our Native American lessons this week. They are all into it. Beginning on Monday, we will be creating Native American dioramas. I have been doing this project for a couple of years. Each year, I add a little more detail to it. Here are some pictures from what my students created last year...


The details...

1. I break my students into 5 groups:
a-Northwest
b-Southwest
c-Plains
d-Northeast
e-Southeast

2. Each group then researches what the houses and geography would look like for the region. They research specific tribes as well as just the area in general. There are examples in our textbooks as well. 

3. Groups then bring supplies from home or find them around the classroom and outdoors. They then work together to create the house inside of a shoe box. Some groups get really into it, others just quickly throw something together. That is, until they see how much effort others are putting forth, and they try again. I wish I had more pictures to show you... I will take some more next week and post them as my current class works on their dioramas. I give the students about 45-60 minutes in class to work on these for about 3-4 days... depending on how they are doing and how much time they need.

4. This year, I have added another aspect to the project. I got the idea from a dear friend that went to Williamsburg with me! Each group is going to be given a folder that they need to include a map and a description of their region they have written.  I look forward to that part of the project too.

5. I grade the projects according to a rubric. I just created the rubric in a website that lets you create one for free. Here is a link to the rubric if you want it... 

Hope this sparks some ideas for you! Let me know if you have any questions!

Wednesday, August 31, 2011

Classroom Library

Sorry for the lag in posts... school has been a mad house! 

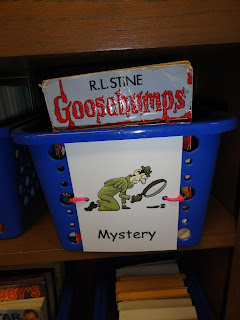
Here are some picture of my classroom library. I worked really hard to get it organized for the year. I chose to sort it by genre, favorite author, or series. Each basket is labeled on the outside. Each book also has a sticker label on the inside so students don't have an excuse for putting them back in the wrong basket.


Nearly all of the baskets are from Dollar Tree... so cheap! A few are from Garden Ridge.


I made the labels on a print program on my computer. I then printed them out on cardstock and laminated them. I attached them to the baskets with zip ties... took a while but I am hoping this will hold them on better than tape.


This bookcase looks a little messy, but the signs hanging on the front are the procedures for our classroom library. I will only leave these up a couple more weeks. 


This is the bulletin board in the library. This is where my students can write book reviews and post them for other students to read. I got the idea from Mailbox Magazine.


Picture books are on the bottom shelf. They are still in the traditional shelving since there are not that many.


Here are my non-fiction shelves also. They are not as organized. I do have some of my history and math books sorted into baskets since I have a lot of those.


Hope that this sparks some ideas for you too! I love to see other people's classroom library for new ideas. 

Wednesday, August 10, 2011

Classroom Pictures!

Well, I had "Meet your teacher" night last night. Here is a little tour of my classroom as it looked before parents and new students came in. It no longer looks this way due to the overwhelming amount of supplies that they bring in with them! It looks like a school supply explosion all over my classroom now! (That is a good thing though... we will definitely use the supplies!) 


View from one side of the room


Calendar, riddle, turn-in papers area, and a graph for back to school night (graph ideas are from KESAM)


Reading Corner, One-on-One meeting table, and writing center desk


My desk/area


Small group area


Reading Corner (palm trees are made from carpet tubes, paper sacks, and umbrellas)


New book baskets in which I have sorted my library by genre


Storage cubbies that hold my math and reading stations/games


Front of the room and more graphs for back to school night


Class Job Chart (every student in my class has a weekly job they are responsible for)


View from the door


Thanks for checking out my blog! Good luck to all the teachers out there getting ready to start school! Have a great year!

Friday, August 5, 2011

Math Workshop

In my classroom, I love teaching MATH!

Last year I started a new way of teaching math... Math Workshop. 

I got the idea from Beth Newingham. If you haven't ever checked out her website, I highly recommend it! There are many, many resources out there for math workshop... I just found hers to be the most simple and easy to implement.

In my class, I split my students into 3 groups. I had a high, low and middle group. I started the lesson with a quick mini lesson to introduce the topic. They were then in a rotation where they spent about 20 minutes either with me for the lesson, at a center practicing the new skill, or at their seat doing an assignment.

I found this process to be amazing! The kids really liked being able to switch what they were doing after 20 minutes rather than sitting through a lengthy lesson and workbook page. I also found that my lower students were more comfortable asking questions and telling me when they didn't get it, in the smaller group setting. I was also able to challenge my higher level students without losing a large population of my class.

Here is the order in which I would do my 60-75 minutes of math:

5-10 minutes: Intro to lesson through a video and short discussion. (Access that prior knowledge)


20 minutes: Low group with me, Middle group at the center, and high group at their seat.


20 minutes: Middle group with me, high group at the center, and low group working at their seat.


20 minutes: High group with me, low group at the center, and middle group at their seats.


The reason I followed this pattern is because I want to work with the low and middle group before they begin their assignment. The high group can usually get through the majority of it and then I can just reinforce and help with the areas that they are still struggling with. This then gives me time to extend the lesson higher for them. All the while, my low and middle groups get a chance to listen to my lesson and practice the skill to reinforce what has been taught before completing their assignment.

Like I said, I really liked this last year! I am going to do some tweaking this year though. I have a larger class this year so I think I will move to 4 groups. I saw a great idea on Clutter-Free Classroom. She has a great math workshop set-up you should check out with 4 groups! She even has a really cute MATH acronym I might have to use!

I think I will add another station so that I have 4: Lesson with me, assignment at your seat, math games(math facts mostly), and skill practice with manipulatives.

I am also going to include more writing! I am making part of their assignment each week to write in their math journals explaining how they did the new skill they learned. I am also going to use some foldables (where you fold a piece of paper with flaps complete with info written in and glue it into a notebook)  I picked up at a workshop this summer!

So my new schedule would look more like this: (90 Minute Lesson)

15 Minutes: Intro to lesson (same as above)

15 minutes: Group A with me, Group B at the skill practice, Group C at games and Group D at their seat.

15 minutes: Group B with me, Group C at the skill practice, Group D at games and Group A at their seat.


15 minutes: Group C with me, Group D at the skill practice, Group A at games and Group B at their seat.


15 minutes: Group D with me, Group A at the skill practice, Group B at games and Group C at their seat.


15 Minutes: Wrap up, journals, answer questions, ask what they got out of the lesson.


So, this is my goal! I will keep you posted on how it goes! Next week I will post pictures of my classroom all decorated and ready for students!

Wednesday, July 27, 2011

Vistaprint Obsession!!!

I have become addicted to something... ordering personalized items from vistaprint.com.

I have ordered all sorts of things! You would think that a married young lady with no children could only use so much personalized stationary and stamps... but that is where you are wrong. I have gone on an ordering frenzy for items for my classroom! I have ordered stamps, postcards, business cards, magnets, signs, and more.

The awesome part about all of this is that it is completely FREE!!! Yes, really free. You have to pay for shipping.... most of the time. However, a couple weeks ago they had a great deal going around the internet that was free shipping on items over $1.... (free stamps happen to offer red ink for the price of $1.50)  ;)  So, all that to be said, I was able to order many free items, and also get free shipping.... just paying for the red ink that I added to my stamps. That deal is now over, unfortunately!! However, they still offer great items and deals! Once you order something, they begin to send you daily deals that you can take part in. If you do not already order from this wonderful site and are interested, let me know and I will recommend you (which I believe rewards both you and I.)

Vistaprint in no way asked me to write a little promo for them, nor do they have any idea who I am... I just love their website!

So... without further adieu, here are some pictures and descriptions of some items I have ordered. I found the ideas for these items throughout the internet and am in no way taking credit for the genius ideas. I just googled "Vistaprint classroom ideas" and it led me to all sorts of cool ideas from other teachers. These are just some that I picked out and ordered.


Business Card sized magnets to send home with the kids at the beginning of the year to stick on their fridge at home:


A yard sign that I will used to put on my door during testing... I did not order the metal stake to stick it in the ground. 


Thank you cards...
Thank you cards inside...

Return address labels that I am going to use as reminders for parent/teacher conferences. I will probably stick them in their planners that week or maybe even one on their shirts to wear home.

Car magnet that I am going to use to put my math groups under... I also made one for reading groups.

Business cards that I will sell in my class store for various passes like whiteboard pass, pillow pass, teacher's desk pass, computer time, different chair, etc.

Sticky notes that I will use to grade notebooks on. This will be a quick place to jot notes or grades on without writing on their journals themselves.

A stamp that I will use for work done together or in a small group that I am not going to formally grade.

Another stamp that I will use to stamp their planners to show that they are filled out and signed.

Business card sized magnets that I just ordered blank to write kids names on and then place under group names for reading and math.

More thank you cards...

Postcards that I will use for when a student misbehaves they can fill this out to reflect on their actions. (You get 100 postcards free)
front

back


Return address labels to use for grading writing assignments

Business cards that are blank "I have, Who has" game cards. I can then write in my own topics and laminate.

Large banner (that is a nice sturdy material) I will probably put on a bulletin board in the hallway to display our work around.

Mousepad...

Return address labels that I can give out at random when I see something great...

Postcards that I will use to write out student's work that they missed

front

back


Business cards that I can hand out when students do something extra sweet


Stamp for when kids are absent, I will stamp the paper so I know why it is late and they know that they missed instruction over that topic (so if they don't get it we know why)


Postcards to use as birthday cards for the kids... I will have everyone in the class sign the back.

front

back


Window decal for the glass window by my door


Homework punchcard...


So, as you can see I ordered A LOT of stuff! I also ordered some things for my husband and myself that no one cares to see. The awesome thing about all of this... it only cost me $6!!! (that is with shipping and all.) Like I said, that free shipping offer is over, but watch for it to come out again. Even without free shipping, it is really reasonable.